

 Español
One of the top 10 common defects in molded parts is bubbles. After demolding from the press, bubble or bump may occur shortly on the plastic area where the back of metal insert lies or where plastic wall is too thick. This is due to the expanded gas released by the plastic that are not completed cooled and molded under the action of internal pressure. The troublesome part defect not only results in appearance problems but impairs physical properties as well. In troubleshooting bubbles, many molders make the mistake of guessing at what the bubbles are, and then immediately start adjusting process parameters to eliminate them, only to find that the defect is really difficult to solve.
At as a injection molder with over 20 years of experience, HS Mold has our own “unique secret ” to tackle such issue. No need too much talking. Look at below examples.
Description
| Part name | Automotive Rear Bumper |
| Material | PP+EPDM+TD15 |
| Color | Black |
| Weight | 3800G |
| Gate | Side gate |
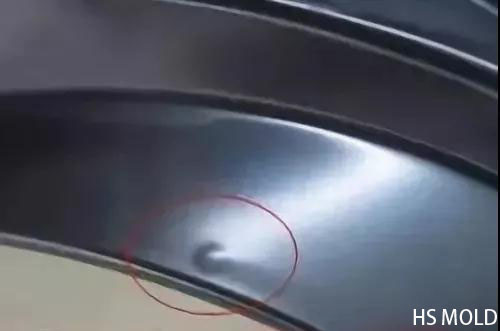
This is auto rear bumper for a brand car program. It is easy to see that there is “bump” or bubble and the bubble area t is the same for every shot during the process of injection molding. It is somewhere around the turning position corresponding to the suitcase cover plate.
1) Possible cause analyse and remedies
Causes:
Part structure:The bump is located on both sides of the trunk cover plate corresponding to the arc position. It occurs on the same arc area on the left and right side at differenent rate. Sometimes the bubble is big and high while sometimes it is just slightly uneven, even difficult to see unless after painting. Using hair dryer baking at 600 ℃, the slight bump bulges to a larger one quickly. We pick up one part with slightly uneven surface, and cut the bubble section. Holes are seen there. See below picture.
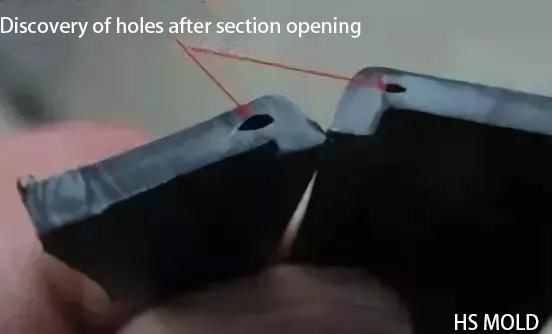
Plastic injection mold:there is no vent on the mold where there is bump. Thus the air is trapped there.
Remedy:
Plastic mold:add venting
Injection molding process: Find the screw potision on the press that corresponds to the bump. Use low speed injection molding at this stage.
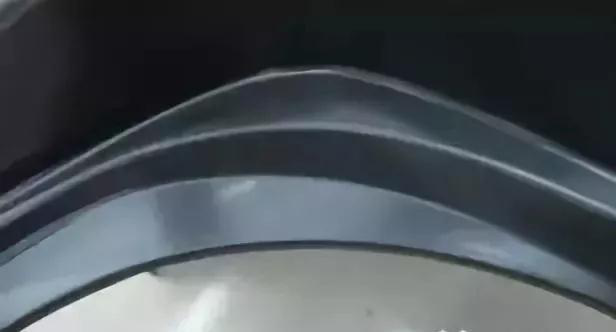
This is the picture to show corrected parts
Important Note: Using hair dryer to identify the causes of bump is simple and direct. In this case, set the hair dryer baking temperature at 600 ℃. If the slight bump bugles quickly, it indicates that the defect is caused by air trap.
For more information or detail, please feel free to contact us at market@hsmolds.com